 Loading... Please wait...
Free Shipping on orders over $400
Categories
Kangaroo Joey Pump: Home Care Enteral Feeding
Posted on 08/20/2016 10:09:47
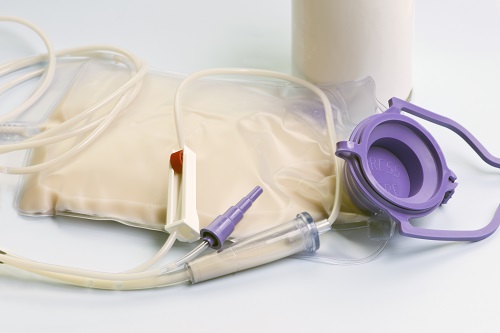
Home care and long-term care that includes enteral feeding has become increasingly common in recent years. Having a medical device that takes the stress out of enteral feeding through a user-friendly, reliable interface can be a profound benefit for a caregiver. One excellent option is the Kangaroo Pump, made by Cardinal Health (formerly Covidien), which is well suited for home use and is often the recommended choice of medical providers.
*This guide is intended to help get you started with your Kangaroo feeding pump. Please read the Operating Manual that comes with your Kangaroo feeding pump before operating it. For all questions, review the Operating Manual or contact the manufacturer.
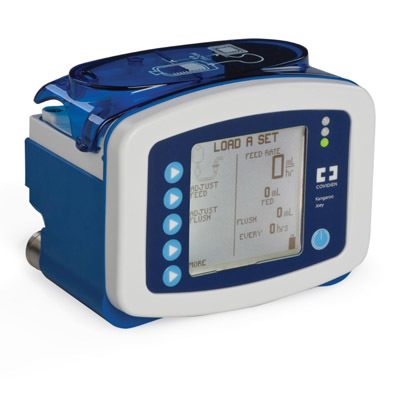
How to Use a Kangaroo Pump for Enteral Home Feedings
1. Complete Initial Setup and Preparation
2 .Connect Battery Pack
3. Attach Pole Clamp
4. Press the Power Button on the Control Pad
5. Keep or Clear Settings
6. Open Pump Set Loading Area
7. Load Pump Set
8. Prime Pump
9. Set Feeding Mode and Parameters
10. Press Run
Below is a quick-reference user guide to get you started. The instructions for operating your Kangaroo Pump are straightforward and user-friendly. Your feeding pump will also come with an easy-to-follow instruction booklet.
Make sure to wash your hands with a
strong
antibacterial cleanser
before handling your Kangaroo Pump. In
addition to this helpful Quick Start guide, you'll also want to review your
Kangaroo Feeding Pump Operating Manual.
1. Complete Initial Setup/Preparation
Unpack your Kangaroo Feeding Pump and connect the A/C power adapter to the A/C power adapter port, located on the back of the pump. Take note of the pin and tab locations on the pump so you can ensure it is properly oriented.
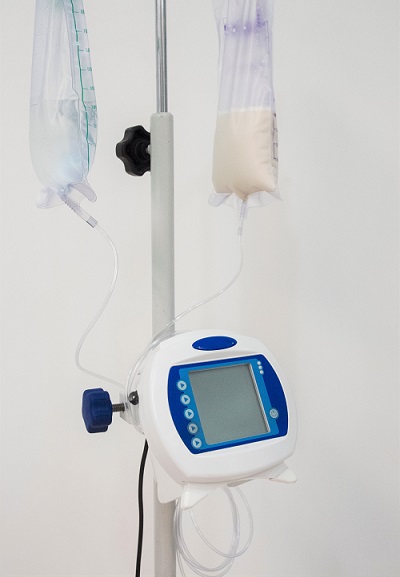
You can choose to mount your Kangaroo feeding pump to an IV pole or set it in an upright position on any stable horizontal surface. Your enteral feeding pump is both splash resistant and shock resistant, so you can choose your location accordingly.
To start, plug in the pump using your power cord and an A/C power outlet. Please note that any time the Kangaroo Pump isn't plugged in, it will be powered by your rechargeable battery pack, which is included within the product packaging.
2. Connect Battery Pack
Your battery pack should arrive fully charged, and whenever the pump is plugged into a wall outlet, the battery will continue to charge. When your battery runs down, leave it plugged in for at least eight hours in order to be fully charged.
Your brand-new battery will provide about 15 hours of continuous power before needing to recharge. Make sure it's always connected since it will provide reliable backup power if you experience an interruption in your electrical service.
3. Attach Pole Clamp
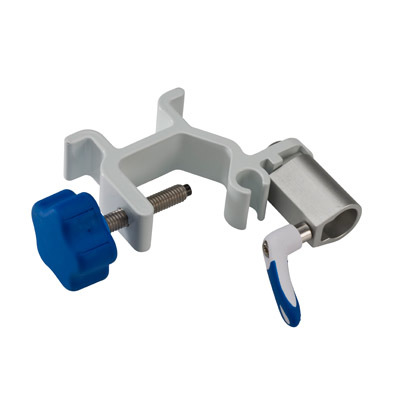
Included with your enteral pump accessories is a pole clamp, which allows you to secure your Kangaroo Pump to a vertical pole, usually an IV pole. This allows you to fasten and restrain the power cord to prevent accidental loss of power during feeding.
All you have to do is place the power cord into the U-shaped groove on the back of the clamp and attach per the enclosed instruction diagrams. Also, if you want to restrain the power cord without using a clamp, you can also use the cord restraint clip that's provided with the unit.
4. Press the Power Button on the Control Pad
Look for the universal power symbol, which is easy to locate on the user-friendly control pad that comes with your Kangaroo Pump unit. Please note that the first time you power up the machine, you'll also need to select the language you'd like the display to use. Once the language is set, you will not have to make the choice again. If you ever do need to change the language, you can change that setting by selecting "More Options" in the menu.
5. Keep or Clear Settings
After you power up, you can either keep or clear the settings from your last feeding. Once you've chosen your appropriate option, you'll see "Load a Set" displayed on the user panel.
6. Open Pump Set Loading Area
Open the pump set loading area. On most units, this door is blue, clearly marked and easy to locate on the unit itself.
7. Load Pump Set
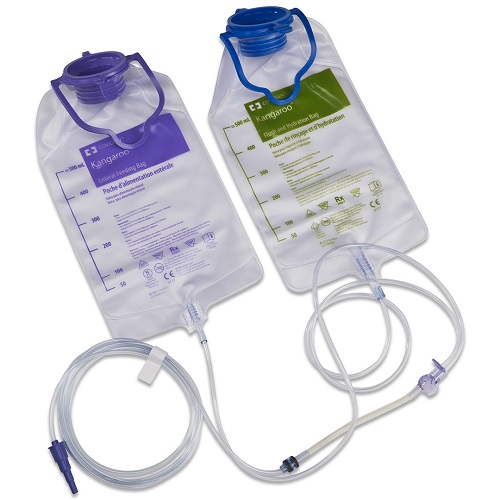
Insert the finger tab into the left-hand pocket, then stretch the tubing around the rotor by grasping the black ring retainer. Wrap the tubing counterclockwise around the rotor – but don't overstretch it. Next, make sure the valve is fully seated by pressing on the finger tab. It should align with the locating rib. Then close the blue door to the pump set loading area. When you're finished, the bottom of the feed bed should sit around 18 inches from the top of the pump.
8. Prime Pump
Now you're ready to prime the pump. Just press "Prime Pump," then "Auto Prime" in order to automatically prime the pump. Or if you'd rather manually prime the pump, you'll press "Prime Pump," and then hold down the "Hold to Prime" button. If you're using a feed and flush set, you'll need to press "Hold to Prime Flush" long enough to allow the flushing fluid to reach the valve. Then press "Hold to Prime Feed" until you see that the feeding fluid has passed the valve and traveled to the distal end connector.
The pump may prompt you to do an Auto Prime if it senses that the current pump set wasn't previously primed, and/or there is fluid in the line, especially near the rotor.
9. Set Feeding Mode & Parameters
You have several options when it comes to setting appropriate feeding modes and parameters. This allows you to customize the feeding as needed. You'll see arrows on the left side of the user display that will allow you to set your feeding parameters. You can also set flushing parameters if you've loaded a feed and flush set. By selecting "More" under the options menu, you can choose continuous or intermittent feed mode as well.
EZMode is an option that provides a limited, continuous-only function that feeds at a flow rate of 0-400 mL/hr that you define. This mode can't accommodate Bolus, Flushing, Run Mode Screen Lock or AutoResume functionality. You also won't be able to see history information in this mode.
If you don't want to use EZMode, you can choose a continuous mode that delivers nutrition at a steady flow rate, either until the supply runs out or the programmed volume has been reached. If you choose an intermittent feeding mode, the pump will deliver boluses of enteral nutrition at predetermined intervals and bolus rate. You can also program the flow rate and bolus volume. To program either, select "Continuous/Intermittent" under the "More Options" menu and follow the appropriate prompts.
10. Press "Run"
When you're ready to start, simply press the "Run" button – you should see "Running" display across the screen. Please note, however, that the pump will only run if the pump set is properly loaded and all appropriate feeding parameters have been successfully programmed.
While the pump is running, the display will show you the feed rate, amount fed and the remaining volume to be delivered. If you're using a Feed and Flush mode, you'll also see flushing data. Anytime you'd like to stop, press and hold the power button – you'll see a countdown start on the display, and as soon as it reaches 0, you can release the button.
Kangaroo Pump Troubleshooting - Frequently Asked Questions
To keep your Kangaroo Pump in top operating form, the manufacturer recommends a series of system performance tests at least once per year or anytime the pump seems like it's operating at less than optimum levels.
These test procedures are included in your owner's manual, but if you're testing regularly and still running into operational issues, the following FAQs might help.
What are the Benefits of Using a Kangaroo Feeding Pump for Enteral Feedings?
- Easy to set up and use
- Intuitive user interface
- Programmable for automatic delivery rate (continuous or intermittent)
- Small and portable – which makes it versatile in how it can be used for ambulatory patient care. You can even carry the portable device in an accompanying Kangaroo Joey Pump Backpack.
- Quiet operation
- Ability to feed and flush with one pump
What is the KTO Feature?
The Keep Tube Open option can ensure that the feeding solution moves efficiently through the tubing without creating any blockages. You can program the desired number of minutes you'd like the machine to run in KTO mode by pressing the button to the left of the KTO icon on the display.
What is the Lockout Feature?
You have the ability to set your pump to run and then lock the screen to prevent unwanted and/or accidental tampering with the settings. The Lockout feature prohibits any button from working except for the power button.
How Do I Clean My Kangaroo Pump?
Cleaning can be performed on an as-needed basis, and ideally by a medical professional who is trained in the cleaning of medical devices. Do not immerse your pump or its A/C adapter in water-- clean only with a damp cloth or sponge. You'll have to take care that no liquids enter the pump in order to prevent electrical shocks, fires or damage to the pump's components.
What Does an Error Screen Mean?
The Kangaroo Pump will display a variety of error messages, which can be triggered by any of the following:
- Feed or Flush containers are empty
- Feed or Flush tube is obstructed somewhere between feeding bag and pump, or between flush pump and patient
- Low battery – an alarm will continuously sound in this case
- Unit is left in Hold mode for more than 10 minutes with no input
- Pump set tubing is incorrectly loaded
- Various system errors – can range from flush errors to flow errors and rotor errors
- Feeding is complete
Further information on these common questions and more are also found in the Kangaroo Pump Operating Manual included with your feeding pump.
Simplify the Process of Home Enteral Feedings
A home enteral feeding pump is an important investment. Patients with an enteral feeding tube may live independently at home for many years with the right caregiver(s) and equipment. With a bit of research, you can identify the option that works best for you and your family. Once you've completed your research and decided to purchase a Kangaroo Joey Pump, Kangaroo ePump, or the Kangaroo Connect pump , you'll find it simple to set up and intuitive to use.
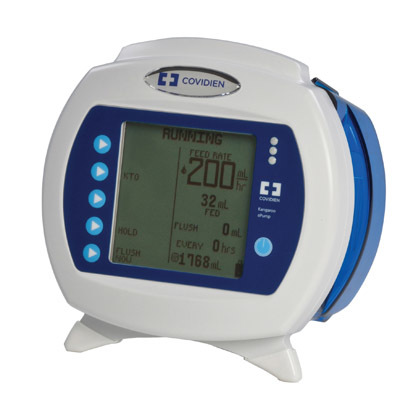
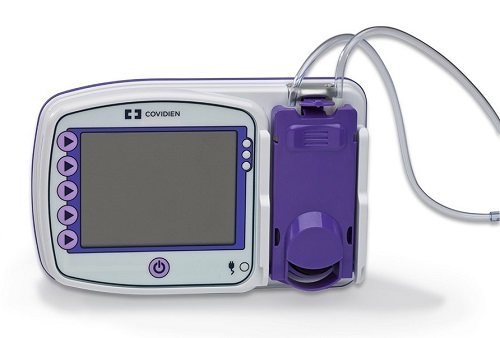
The Kangaroo Enteral Feeding Pump is the market leader – a reliable and popular choice that has worked well for many families. If you have questions about the best enteral feeding pump technology for you and your family or need additional Kangaroo pump sets along with any other long-term care supplies, don't hesitate to contact us.
You can trust the team at USA Medical and Surgical Supplies to help you make good decisions. We have decades of experience researching and recommending medical supplies and equipment. Please contact us if you have any questions about the right equipment or supplies. Call us today at 1-866-561-2380, or Contact us.


